Leverage Long on Furucombo
Leverage Long on Furucombo
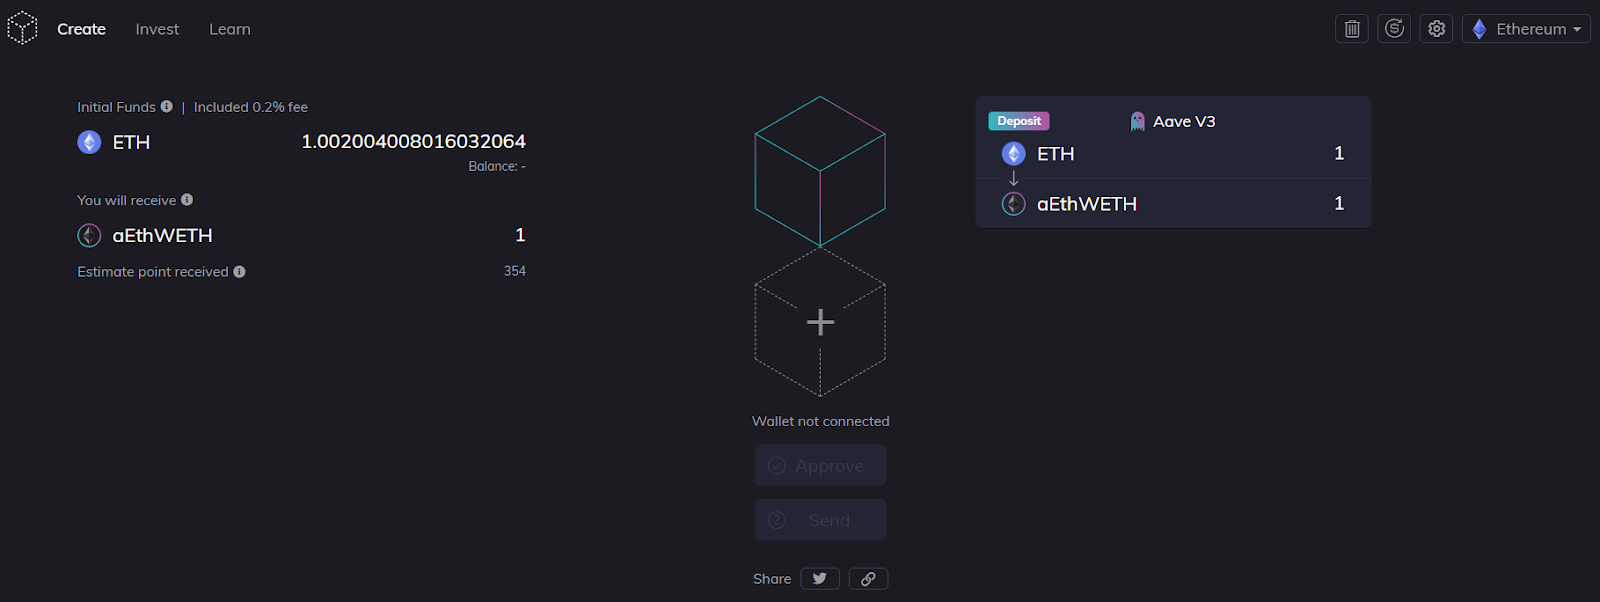
Aave Deposit

Return Funds
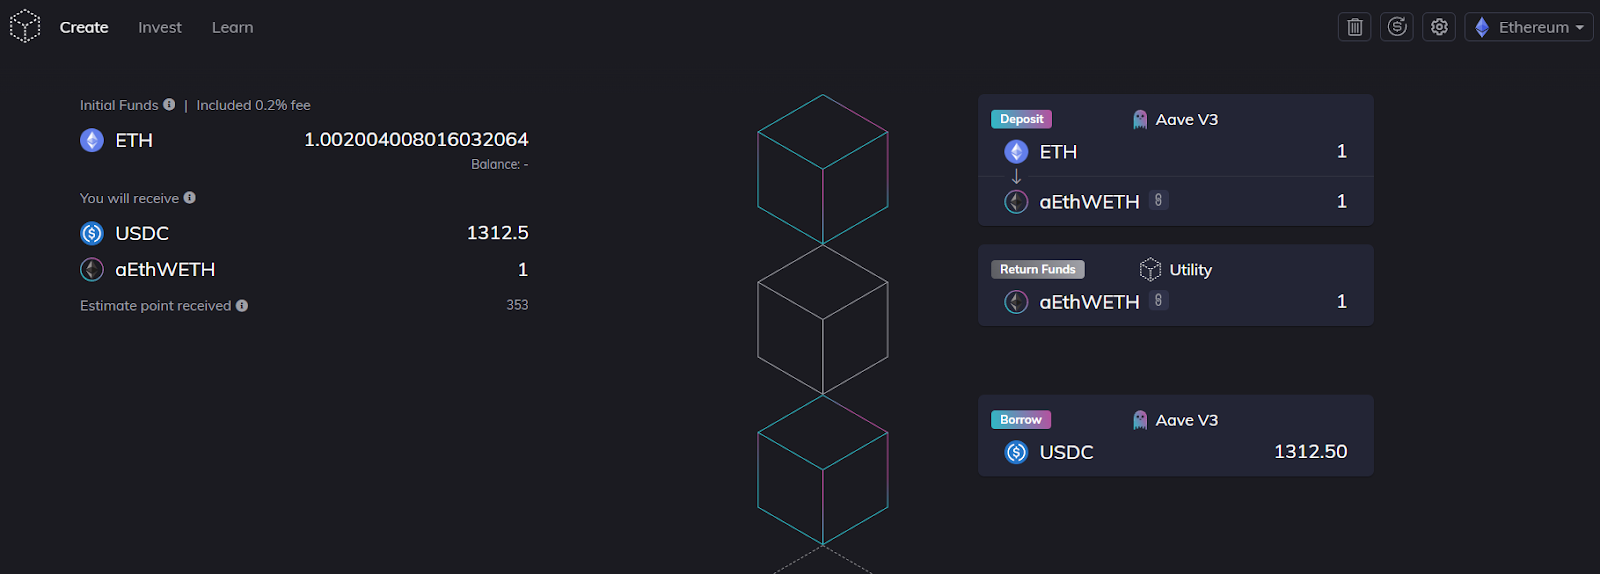
Borrow a fund on Aave
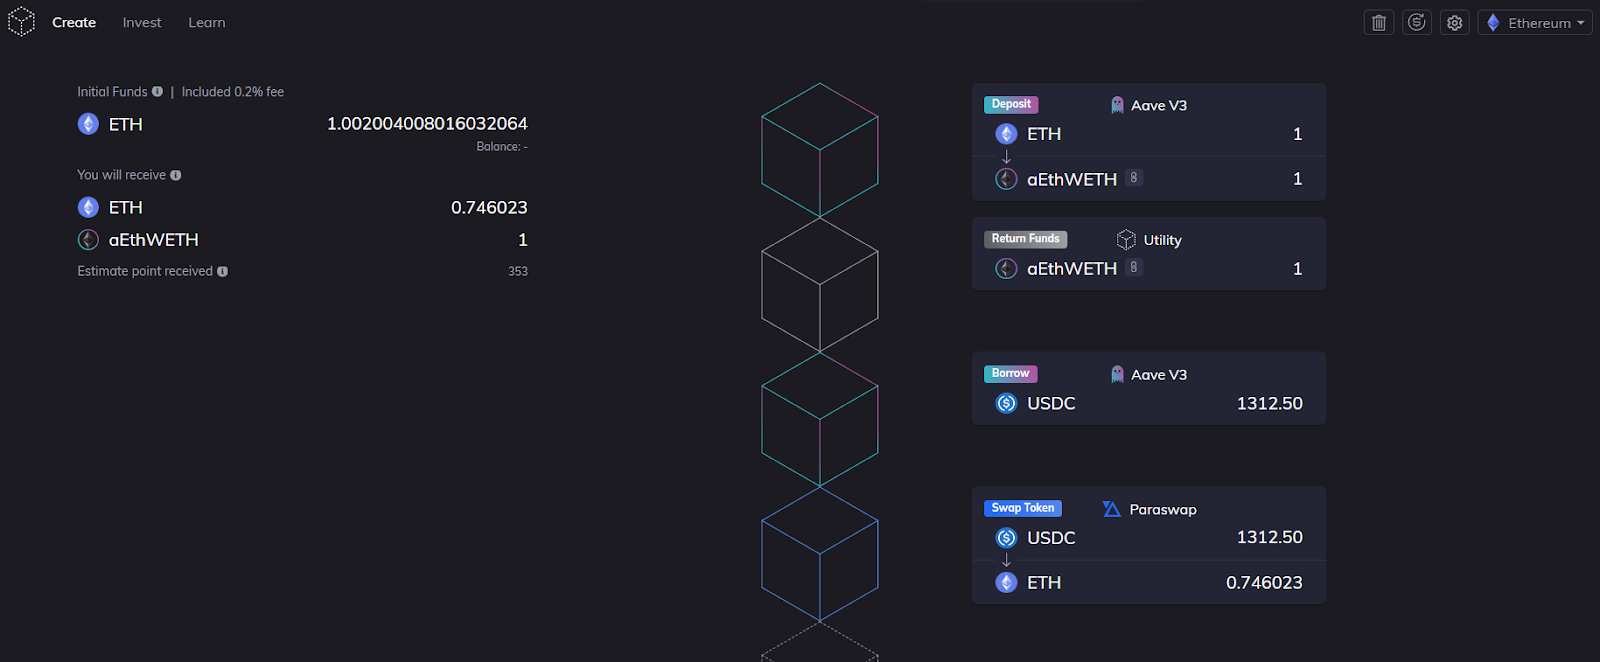
Swap the borrowed USDC to ETH

Create a flashloan cube

Deposit funds to Aave
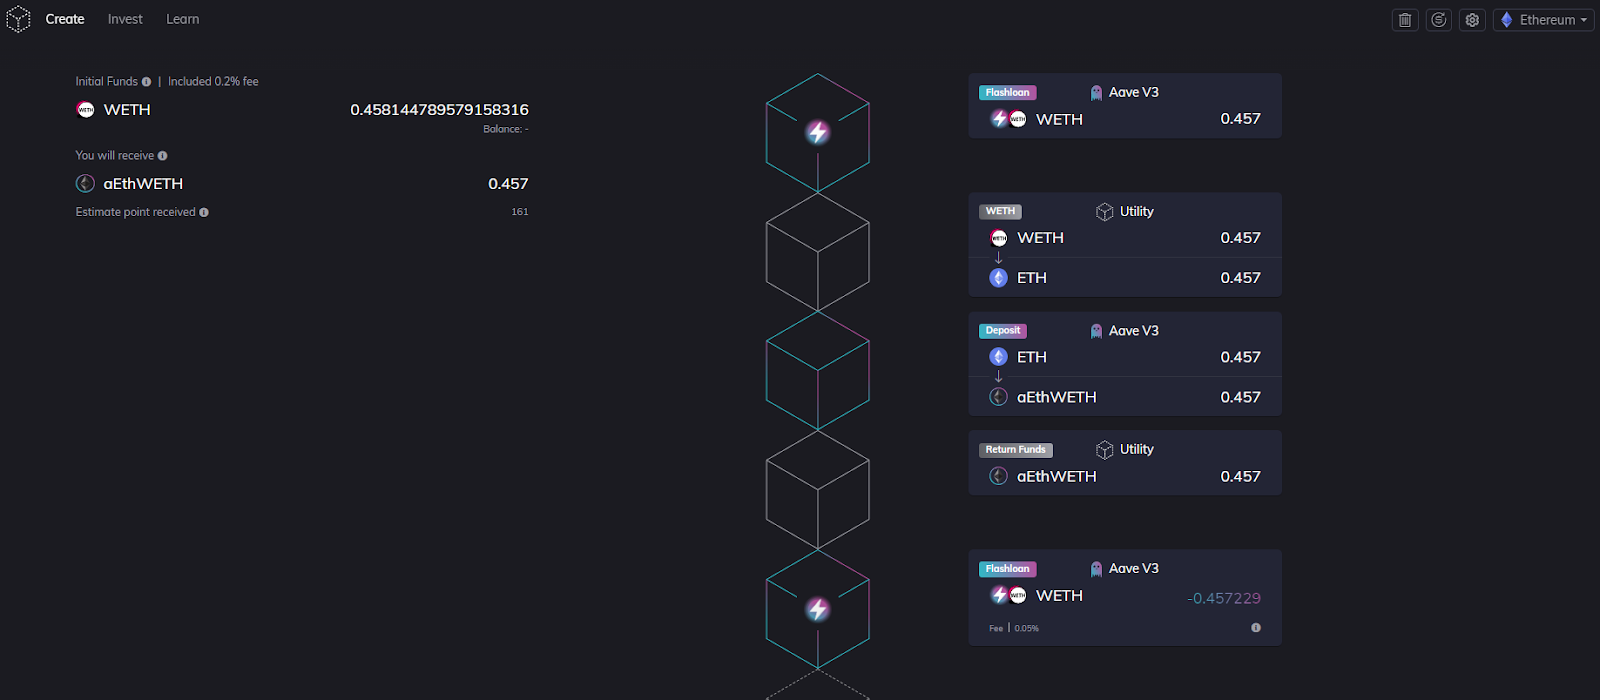
Return Funds

borrow a stable token from Aave
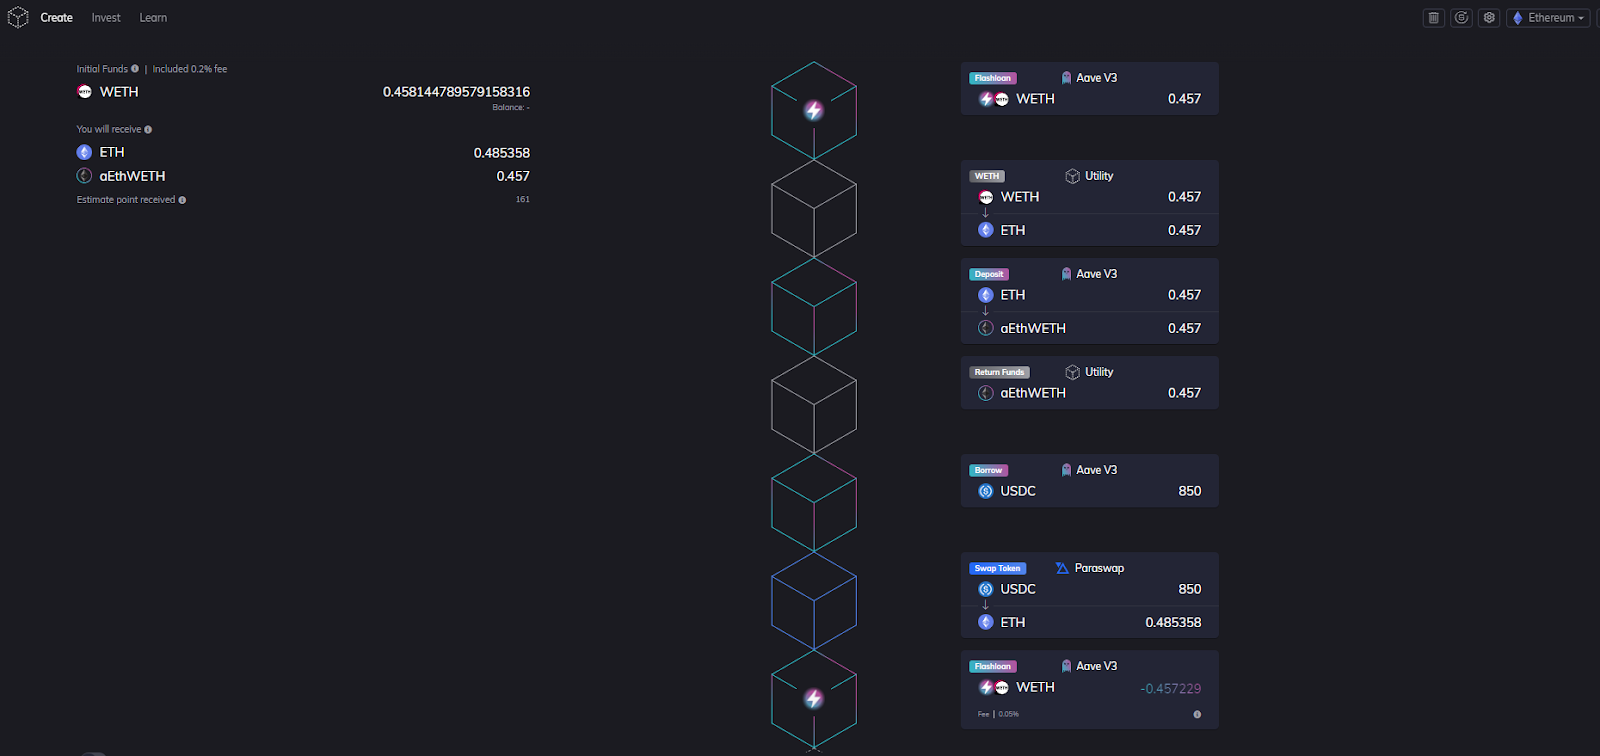
Swap the borrowed USDC to ETH